Follow step-by-step instructions, complete with crucial visual cues, to ensure you measure your DX Evaporator coil accurately for a seamless installation. Recently, we covered how to precisely measure a DX Evaporator Coil for pricing. Assuming you've nailed down the cost and secured the job, congratulations! It's now time to focus on the finishing touches to guarantee everything fits perfectly. When it comes to installing a new coil, details such as casing depth, header positions, distributor locations, and return connection placements become vital measurements. These factors play a significant role in ensuring smooth installation and optimal performance. First up, let's talk about casing depth. The casing typically uses the full depth of the coil section, so it's essential to measure the distance from one side of the entering air to the other side of the leaving air. You'll want to measure this directly from the outside of the casing. For added peace of mind, I also check the total depth available inside the coil section. This information can be valuable if the customer decides to adjust the capacity, allowing for more or fewer rows to be used. Next, consider the casing height. I double-check this by measuring from the top edge of the top flange to the bottom edge of the bottom flange. Alternatively, I add the heights of both flanges to the finned height. If something seems off, confirm that the flanges are standard stacking flanges, similar to the ones shown above, rather than inverted, knife-edged, semi-inverted, or any other type. Non-standard flanges might lead to confusion, but even if they're not typical, document the total height since this is crucial. Flanges can be trimmed if necessary. Now, move on to measuring the casing length. Start at the edge of the vertical flange nearest to your supply and return connections and measure to the edge of the opposite end's flange covering the coil's copper U-bends. Equally important is the Overall Length (OAL). To confirm this, you need to take three measurements. 1. Measure the C dimension: the distance from the end of the fin pack to the end of the return header. 2. Measure the fin length: measure at the top or bottom of the coil near the flanges, not in the middle. Ensure your tape measure starts and ends inside the end flanges. 3. Add the fin length to the MAX dimension: that's the distance from the end of the fin pack to the outside of the U-bend at the other end of the coil. The sum of these measurements represents the overall length of the coil, including headers (but not including the return connection, which may extend out of the unit). I always measure the total available length of the unit to ensure my OAL fits correctly and to see if there’s any extra space if needed. When it comes to circuiting, it’s all about the count. Make sure you get: • The number of circuits Even if the coils are occasionally re-piped by the installing contractor, it’s best to keep the return connection and distributor locations as they are. Record the distance from the bottom of the coil’s casing to the center of each connection point: Record the distance off the connections from either face of the coil: And record the distance in or out from the end of the fin pack: The connection locations on, say, a dual-circuited DX coil can be double-checked by measuring the center-to-center distance between the two connections. Also, measure the diameter of the sweat return connection. Once all construction details are confirmed, the coil’s performance and construction should align perfectly with what’s required. Sometimes, adjustments such as fin density or the number of feeds/circuits are made to tweak capacity without altering the basic construction. Ultimately, it’s about finding what works best for the customer’s specific needs. If all this measuring seems overwhelming, don’t worry—it’s why experts exist! Feel free to reach out, and Nationwide Coils will handle these measurements with ease and precision. Car Brake,Auto Brakes,Car Brake Parts,Car Brake Disc CHANGGE FUKANG MACHINERY ACCESSORIES CO. ,LTD , https://www.fukangcasting.comMeasuring DX Evaporator Coils for Perfect Fit: Tips from Chris Wright

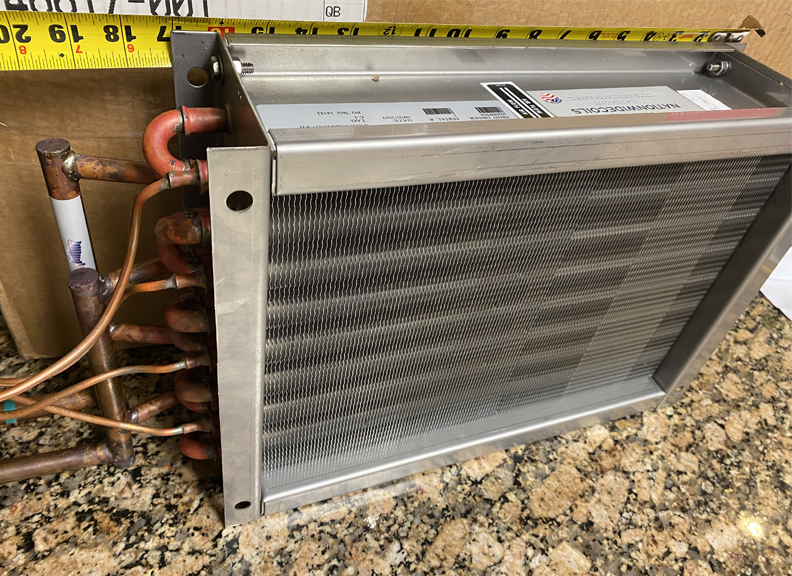
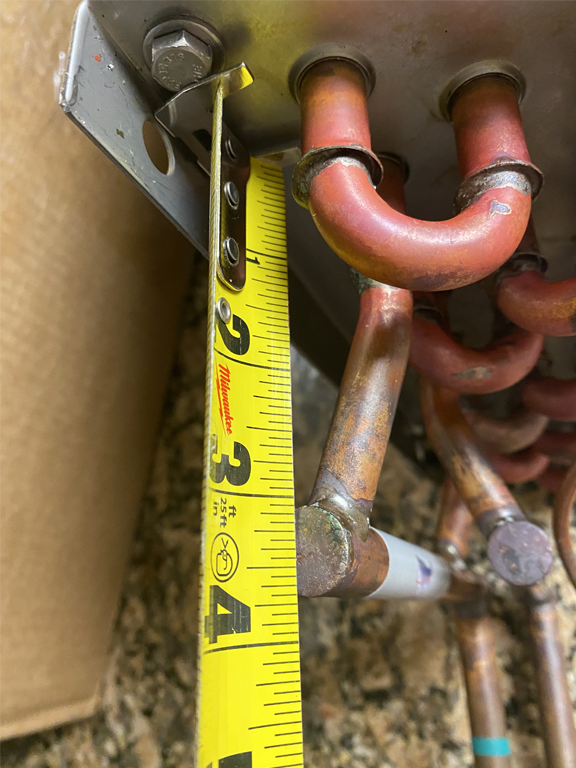
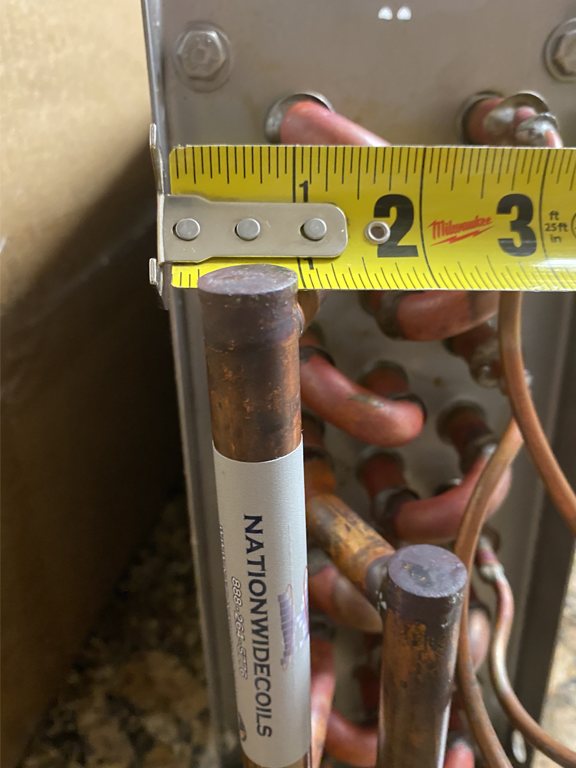
Measuring the casing depth
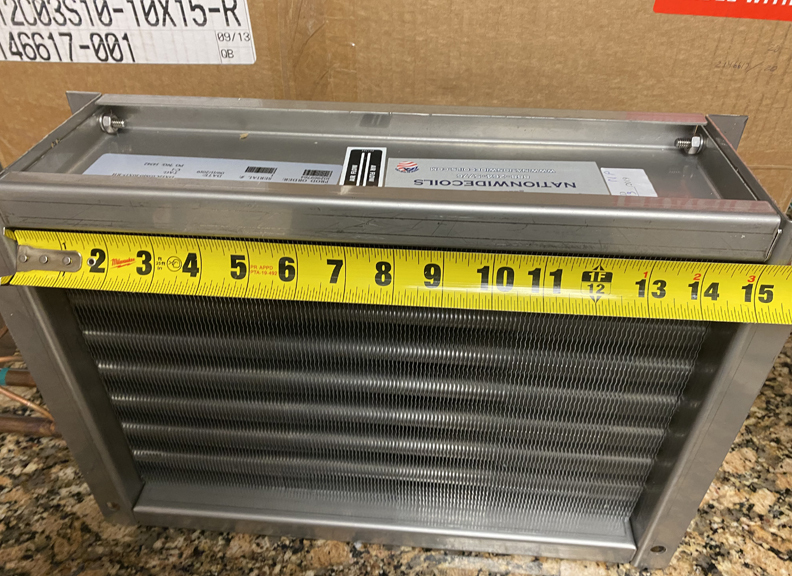
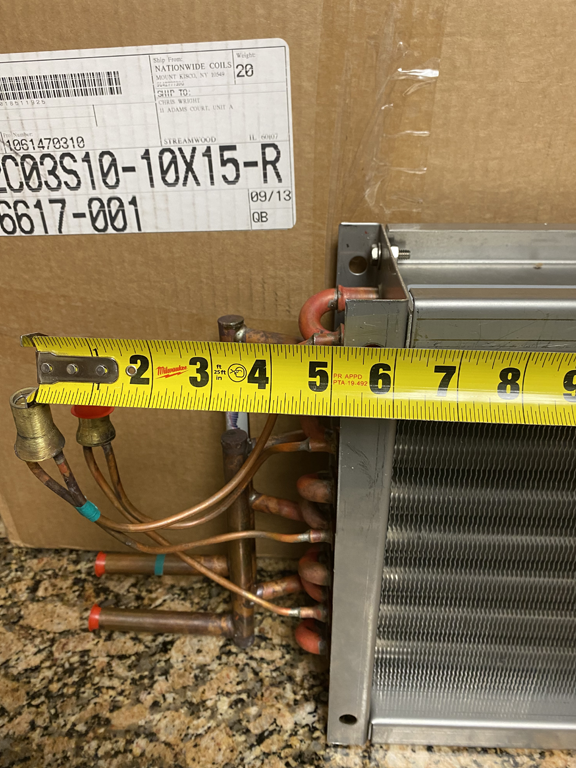
Measuring the casing length

• The number of feeds on each circuit
• The number of capillary tubes on each circuit. While counting, also note the number of tubes you can count from top to bottom of one row. This can help you if you encounter issues verifying the finned height.
Written by: Chris Wright
Nationwide Coils Account Manager, Chicago
USE OUR BLANK COIL DRAWINGS AS A GUIDE
June 21, 2025